ROM
hacking is a fun, and possibly illegal way to breathe life back into those stale
ROMs idly sitting on your hard drive twiddling their thumbs in boredom. In fact,
you can take the worst game ever created; I'm talking about Dr. Jekyll and
Mr. Hyde of course, and turn it into an enjoyable afternoon. The majority
of ROM hacking is done by editing graphics using a tile editor, and editing code
using a hex editor. Since this article is meant for beginners, I'm going to discuss
how to edit the graphics in a ROM. Editing graphics is pretty simple, and provides
quicker results, then learning how to edit hex. However, if you really want to
alter a ROM, you will need to learn how to edit the hexadecimal code.
To
get started, you'll need a tile editor. There are several free tile editors available
that will work just fine; I will be using Tile Layer Pro for this article. Many
people have different tile editors they prefer to use, and I really don’t
care which one you choose…as long as it’s Tile Layer Pro. You can download
Tile Layer Pro by visiting www.romhacking.net/utils/108/, and clicking the Download
File Now link.
The next thing you’ll need is a ROM. In this article,
we will be using NES ROMs, though Tile Layer Pro is capable of editing ROMs for
most of the 8 and 16 bit systems. In all likelihood, you already have a nice library
of ROMs sitting on your hard drive; if not, I can’t legally tell you where
to get them, but if you Google it, I’m sure you’ll figure it out.
Last,
you will need an emulator. I use Nestopia for my NES ROMs and it works fine. Much
like the tile editor, there are several free emulators available. If you don’t
have an emulator, Google Nestopia, then download and install it.
Before
editing any of your ROMs, you should make a copy of them. It’s a good idea
to have one folder for unaltered ROMs and another for altered ROMs. This will
allow you to have a copy of the original ROM when, I mean if, you mess something
up.
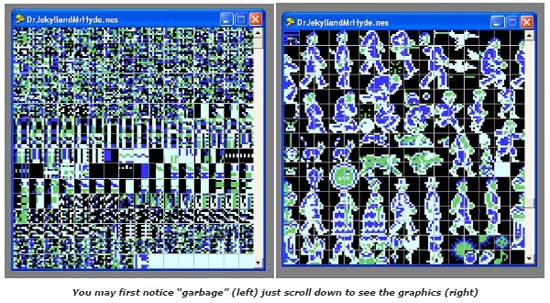
First open the tile editor, then go to File/Open, and select the ROM
you would like to edit. You will notice that four boxes appear. The first box,
lo-cated on the left-hand side of the screen, holds the graphics which are stored
in the game. In all likelihood, the box you are looking at is filled with garbage,
very similar to the white noise seen on a television. You are seeing this white
noise because the tile editor is creating an image based on the data stored in
the ROM. Simply use the arrow on the right side of the box to scroll down, and
you should eventually reach images you recognize.
You
will notice that the graphics are stored in small squares called tiles. These
tiles are usually made of 64 pixels, and contain four colors, one corresponding
to transparency. You will also notice that the graphics may be stored irregularly.
For instance, a character’s head may be stored in one space, the arms and
legs in another, and the body in yet another. This brings us comfortably to the
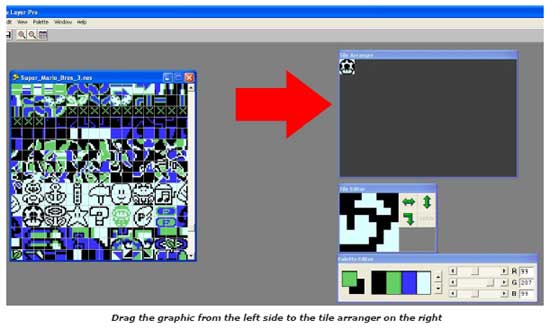
tile arranger box.
The tile arranger box lets you drag tiles to it, and
recreate the image to make it easier to see. Try it out, just left click on a
tile and drag it to the tile arranger box. You may select a tile for editing by
left clicking either a tile in the box containing the graph-ics, or by left clicking
a tile in the tile arranger box.
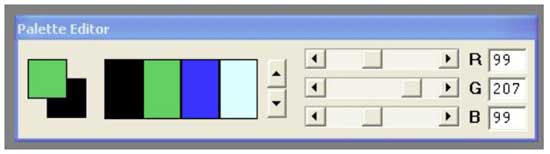
When
a tile is clicked to edit, it will appear in the tile editor box. The palette
editor box will contain the colors you can use to edit the tile. It doesn’t
matter what colors are shown in the palette editor box, the actual colors that
you would see when play-ing the unaltered game are the colors that are available
to edit the tile with. The colors you see in the palette box are to make it easier
for you to see, and do not correspond to the actual colors you will see when playing
the game.
To edit the image, simply put your cursor over the image in the
tile editor and left click. This will change one pixel to the primary color selected
in the palette editor box. If you would like to use a dif-ferent color, just left
click the color in the palette editor box that you would like to use. To make
a part of the tile transparent, simply right click the image, the secondary color
is auto-matically set to the color used for transparency. You will notice that
you can edit only one tile at a time. In order to change the tile, you are editing,
just left click a different tile. Go ahead and try it out.
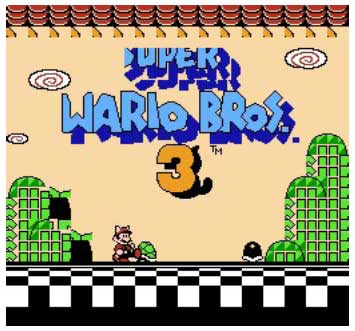
Take
a look at the picture in which I changed the Super Mario Bros. 3
start-up screen to say
Super Wario Bros. 3. When you are finished
go to File/Save, to save your altered ROM.
Then play the ROM in your emulator
to view the results!
Tile
Layer Pro will also allow you to import and export bitmap images. To export a
bitmap image, right click an area in the graphics box and drag the cursor to select
the tiles you would like to export. When you are finished, select Edit/Export
Bitmap, and you will be prompted to save your selected tiles as a bitmap image.
To import, go to Edit/Import Bitmap and select the bitmap image you would like
to import. The image you have chosen to import will then appear inside the graphics
box, drag the image to the tiles you would like it to replace, and then click
elsewhere in the graphics box. The imported bitmap will then replace the tiles
it is above. This is a handy feature that will allow you to take images from one
game, and import them to another!
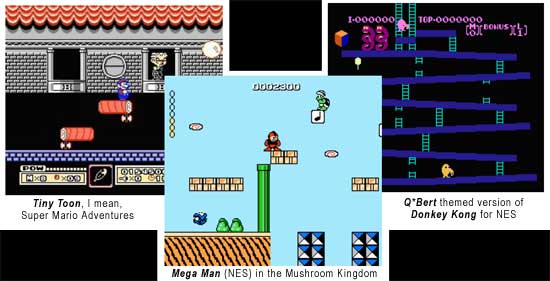
I will warn you, if you try to do something
silly, like import a bitmap image of your head to replace Megaman’s
head, it will show up as white noise. The imported image must be stored in the
correct bits per pixel (Bpp), which is 2Bpp for NES games. Also, it cannot contain
more than four colors. Don’t believe me? Go ahead and try it!
Finally,
no tutorial on graphical ROM hacking would be complete without this final note.
Remember all the white noise I was talking about at the beginning of the article?
That white noise can provide a bit of entertainment for the bored at heart. While
you’re in the tile editor, try rearranging some of the white noise. Since
that noise is really game data, messing with it can have interesting, fun, and
completely random results. Be sure you have a back-up of your original game, and
your graphical hack if necessary, as messing with the data can render the game
unplayable. Messing with the game data is called corrupting the game, and there
are a lot of videos on YouTube devoted to this popular pastime.
There you
have it; you are now officially a ROM hacker! Okay, maybe it’s a little soon
to call you a hacker, as you haven’t learned to edit hex yet, but at least
you know something. If you would like to go ahead and get your hands dirty by
editing hex, I would suggest visiting http://www.romhacks.net,
they have several great tutorials for beginners that will teach you more advanced
ROM hacking techniques, and they even have a graphic editing tutorial in case
you need a recap.
Enjoy!
If you enjoyed this article,
be sure to check out the latest issue of

This article written for Video
Game Trader by Dustin
Gulley